Sun and water can prove to be seriously harmful to the surface of your deck or balcony over time. Summertime heat with ultra violet rays alone can cause cracks and breaks in the waterproofing system’s surface, leading to water damage to the areas below. Water damage can even lead to structural failure and, in some cases, full collapse of your deck or balcony.
Based on our experience, few home maintenance projects meet the importance and satisfaction levels of properly repairing a water intrusion issue or shoring up your waterproofing. Post-remediation, don’t forget that a good maintenance program includes inspecting your deck or balcony surface each year and waterproofing or re-sealing the surface every three to four years.
Here we outline the key steps in a balcony repair and waterproofing project, necessitated by years of sun and water, further exacerbated by neglect. Included in this repair is the installation of a new waterproofing system on top of the existing infrastructure with needed repairs.
Table of Contents
- The Seriousness of Waterproofing
- The Importance of Hiring a Waterproofing Specialist
- The “Before” State of Our Balcony
- Step 1: Demolition of Old Surface and Inspection of Underlying Structure
- Step 2: Repair the Existing Structure
- Step 3: Install Galvanized Metal Lath
- Step 4: Install the Waterproofing System
- On-Going Maintenance
- Waterproofing Resources
Also see:
- The Latest in Residential Floor Restoration Solutions & Options
- 20 Best “How-To” YouTube Videos for Home Maintenance
- Why You Need a Fix-It Game Plan for Your Newly Purchased Home
- How to Choose a Qualified & Trustworthy Contractor
- More Recommended Home Maintenance Reading
- Related Topics: Water Damage | Home Maintenance | Renovations
The Seriousness of Waterproofing
The 2015 Balcony Collapse in Berkeley, California
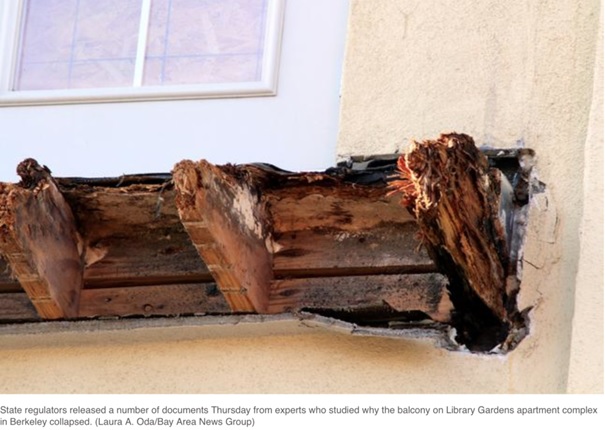
When thinking of the maintenance of balconies, we are sadly reminded of a very tragic situation that occurred in Berkeley, California in 2015, where six young student revelers at a birthday party died when a balcony collapsed and they all plunged to the asphalt below. Seven others survived, but were seriously injured.
What is important to note about this particular case, is that the balcony and the building were constructed by a reputable, licensed, bonded and insured general contractor. The investigative report by the California Contractors State License Board (CSLB) revealed that the building contractor “failed to make the balconies waterproof”. Furthermore it was revealed that “dry rot damage … along the top of the cantilever balcony deck joists,” or supports, ultimately caused the balcony to break off from the building.
The Importance of Hiring a Waterproofing Specialist
As the catastrophic Berkeley balcony incident reminds us, always hire a reputable waterproofing specialist to perform thorough deck refinishing and waterproofing.
Water is extremely caustic to wood framing and the underlying building structure, thus waterproofing of these structures requires years of specialized knowledge and skill. You may be tempted to hire a general contractor to perform this task, but based on our experience, we implore you to hire a specialist. What a specialist knows about the available technology, products, and best practice techniques can save you having to repair your deck every five years.
Waterproofing specialists are usually wedded to a particular brand of waterproofing system, such as Dexcelent, Desert Brand, Westcoat, or Pli-Dek and understand every aspect of that system’s best installation practices.
Specialists enroll in continual education of that vendors’ products to make sure they understand and implement any changes that may be necessary due to product enhancements or newer technology offerings.
Simply stated, it is not practical for general contractors to maintain this high level of commitment to just one aspect of their businesses. Since waterproofing specialists are devoted to one line of work, they must be the best in their area of expertise and follow the manufacturer’s instructions to insure their warranties for their customers.
All of the specialists, from whom we requested bids on our project, provided workmanship warranties greater than 5 years, based on manufacturer’s suggested installation requirements and instructions.
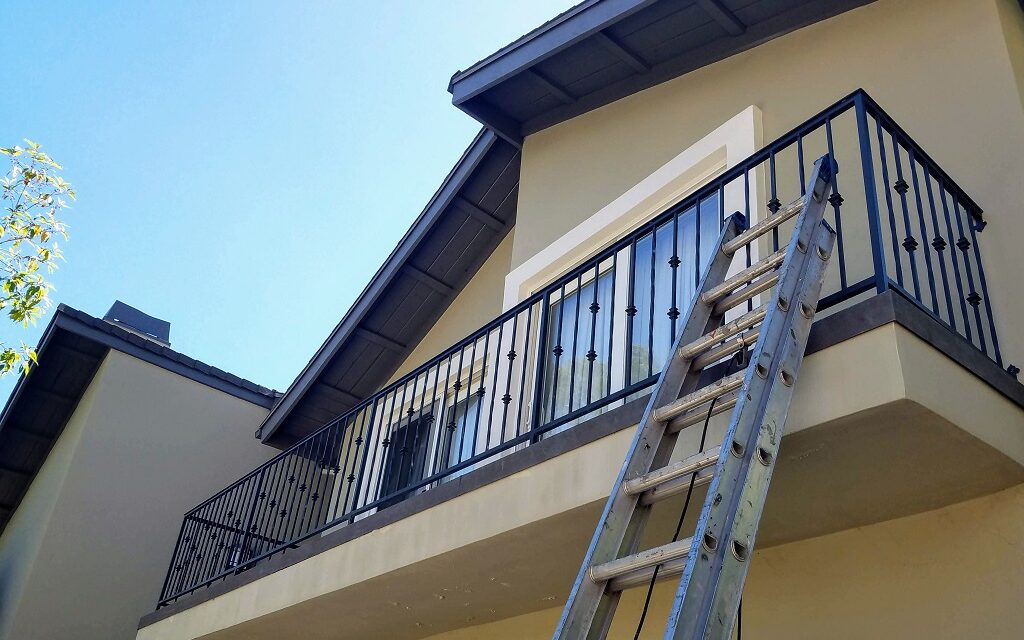
The “Before” State of Our Balcony
As we always suggest to our readers, we requested and received three proposals from three qualified, licensed, bonded and insured waterproofing specialists. The assessment by all three waterproofing experts revealed that the existing substructure would need demolition down to the plywood substructure.
Two proposals suggested the project would require additional sloping, while one vendor suggested installation of front gutters.
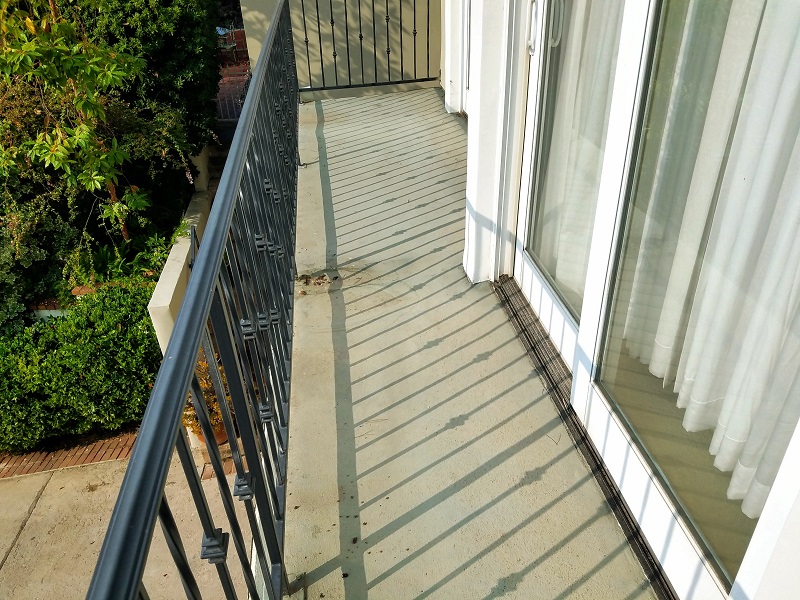
Balcony Deck Waterproofing Project: Before Photo
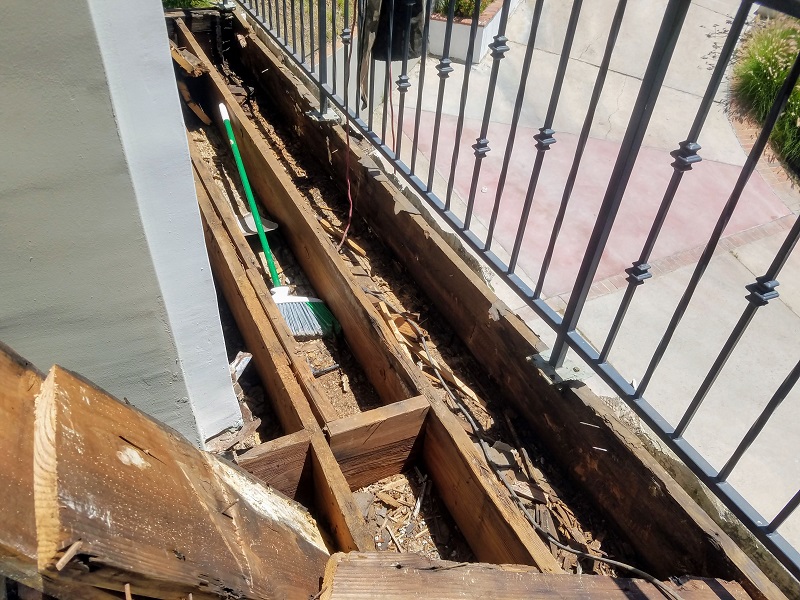
Step 1: Demolition of Old Surface and Inspection of Underlying Structure
Although structurally sound, the balcony did exhibit some wood rot of the 2×12 boards at the front of the balcony edge, a result of the absence of drip metal flashing installation during the original construction. Replacement of the boards, the plywood flooring, and the addition of drip metal flashing were all necessary, before the actual waterproofing could begin.
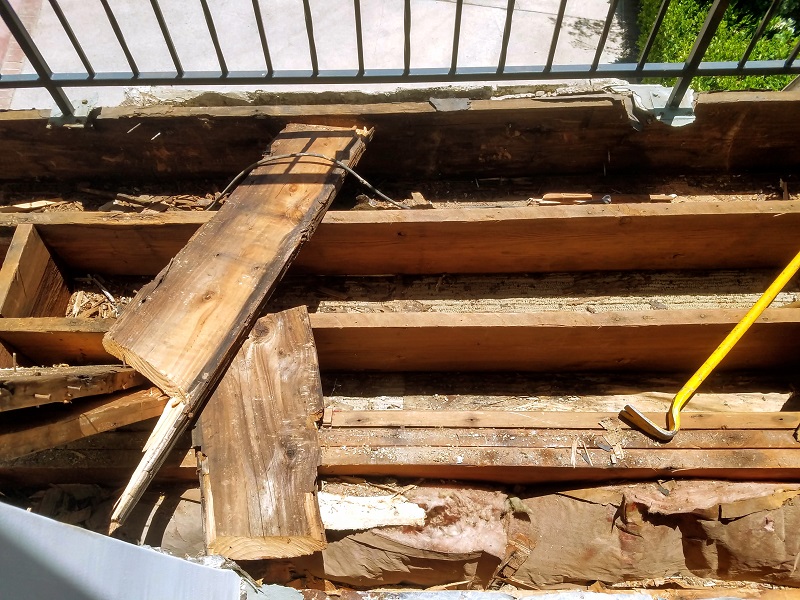
Balcony Deck Waterproofing Project: Demolition Step
Step 2: Repair the Existing Structure
The replacement of 42 linear feet of 2×12 board required that old rotted board be cut out and removed. The two new redwood planks were lifted and nailed in place of their aged and weathered counterparts. Three new 3/4 inch thick CDX plywood boards were cut to fit the shape of the approximately 88 square foot deck and nailed to the 2×12 boards.
Flashing is installed to prevent water and other elements from flowing into the structure from a joint, in this case, where the wall meets the deck structure. The existing wall-to-deck flashing – still in good shape – was then nailed onto the new plywood floor substructure, caulked, overlapped, and fastened in place. This creates a subfloor to which the waterproofing system will be applied, as the deck framing is now structurally stable.
Next, 4×6 Bonderized 24 gauge steel drip edge flashing is installed, where previously none had existed, is overlapped, fastened and sealed on all joints and seams. This will prevent rotting and damage of the outer, newly installed 2×12 decking boards.
Bonderized steel is galvanized steel that has been put through a phosphate bath and a chromate dry. The resultant dull grey color provides an excellent “primer” for painting applications. The other name for “Bonderized steel” is “paint grip steel“.
Balcony Deck Waterproofing Project: Damaged 2×12 Boards
Step 3: Install Galvanized Metal Lath
Once the repairs were made, the actual waterproofing of the structure begins with the installation of 2.5 pound, diamond-mesh, galvanized metal lath, which is a necessary component for the polymer modified concrete layer to bond with the plywood.
Sheets of the galvanized steel lath are stapled to the plywood using heavy duty one-inch crown staples. The mixture of steel and wood provides flexibility and strength to the finished product. All of this is performed while making sure to maintain the required slope that will allow excess water to drain off the surface and eliminate “bird baths” or “puddles” on the deck’s surface
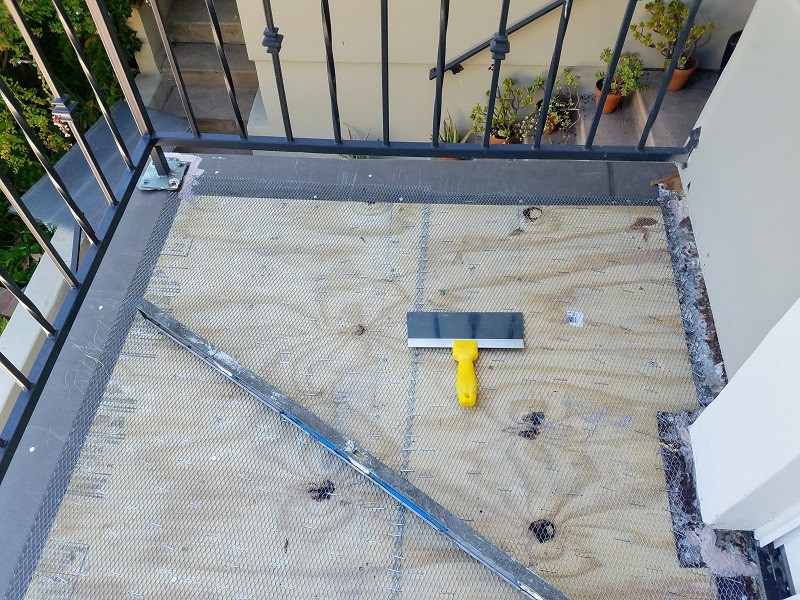
Balcony Deck Waterproofing Project: Galvanized Metal Lath

Balcony Deck Waterproofing Project: Closeup View of Galvanized Metal Lath and Front Flashing
Step 4: Install the Waterproofing System
Finally, the structure has been prepared for the actual installation of the waterproofing system.
The first layer, which is applied directly to the metal lath and plywood subfloor, is a base coat of silica modified cement. Old Castle Silica Sand is mixed with Riverside Portland Cement Type II to form a consistent and uniform mixture that will adhere to the subfloor, dry and create a solid cementitious base. This coat dries quickly, so spreading the mixture over the lath-plywood base should be done quickly, but evenly.
This base is then sealed with an acrylic latex layer of concrete masonry to enhance the protection and seal the concrete.

Balcony Deck Waterproofing Project: Coated Cement
The next coat is a fiberglass resin mixed with polyester, which is a laminating resin that provides a strengthening reinforcement.
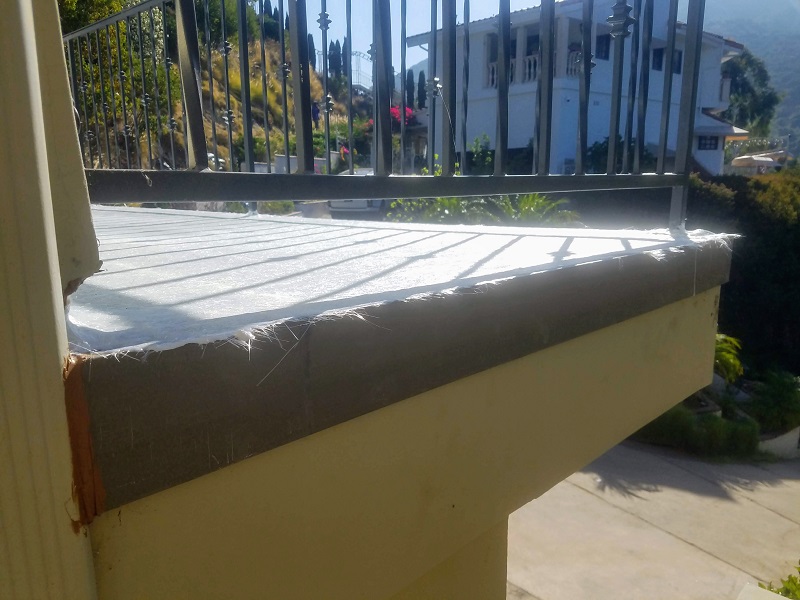
Balcony Deck Waterproofing Project: Fiberglass Resin
Next the texture of the final product is applied. In our case we opted for knockdown texture, which has a smooth-feel that looks clean and is easy to maintain. Knockdown texture also makes the surface more slip-resistant.

Balcony Deck Waterproofing Project; Knockdown Texture Closeup View

Balcony Deck Waterproofing Project: Completion!
On-Going Maintenance
Our contractor suggested that due to the East facing balcony’s prolonged exposure to sun during any given day in Southern California, that we maintain our balcony every 3 to 4 years. The process can be performed by a contractor or DIY, if preferred.
The DIY process typically involves the following steps:
- Make sure you will have three days of good, sunny weather before beginning the project
- Clean the balcony well by using a power washer or brush
- Allow the balcony plenty of time to dry
- Use a paint brush to apply the sealer to the edges of the balcony
- Be sure to apply the sealant thoroughly around the railing footings
- For the main area of the balcony, use a paint roller, being sure to paint yourself towards the balcony door to your residence
- Allow the sealer to cure for a minimum of 48 hours
Waterproofing Resources
- How to lay Metal Lath on Balcony for Waterproofing
- Water Absorbent Material Caused Fatal Balcony Collapse
- Berkeley Balcony Investigation Materials – CSLB
- Berkeley State Release Documents on Cause of Deadly Balcony Collapse
Recommended Reading
- Unforeseen Circumstances: Planning for Post-Demolition Surprises
- How to Choose a Water Leak Detection System for Your Home
- Home Inspection Technologies to Alleviate Your Purchase Anxiety
- When to Get a Home Warranty & Alternatives to Seek When Not
- 10 Traits of Innovative Homeowners
| Purgula is reader-supported. When you click on links to other sites from our website, we may earn affiliate commissions, at no cost to you. If you find our content to be helpful, this is an easy way for you to support our mission. Thanks! Learn more. |


